
In This Article
Cracks in your walls can be an eyesore, a source of worry, or both. While a small hairline crack might purely be an aesthetic concern, larger cracks can indicate structural issues or underlying moisture problems. Regardless of the severity, you can get professionals to repair the cracks in your walls. Read on to know how they do it!
First things first: Why do walls crack?
Just like clothes can shrink in the dryer, walls can crack due to slight movements caused by significant temperature changes. Another reason is uneven ground settlement beneath the house, similar to stepping on a soft patch of dirt where the ground isn’t perfectly flat. Additionally, if the wall wasn’t built strong enough initially, it might crack under pressure.
Vertical cracks are more likely due to the house shifting or settling, while horizontal cracks can result from structural stress or poor construction quality
How do you permanently fix cracked walls?
To permanently fix cracks, professionals typically use a multi-step process that involves:
#1: Diagnosing the crack

The first step before calling in the professionals to repair that crack in your wall is to assess the crack itself. Here’s how you can do it:
- Size and location: Hairline cracks (less than 1/8 inch wide) are usually cosmetic and require simple patching. Larger cracks (wider than 1/4 inch) or those accompanied by bulging walls or uneven floors might indicate structural problems and require professional evaluation. Cracks around windows, doors, or near corners often suggest foundation issues
- Movement: Monitor the crack over time. It might indicate ongoing settlement or foundation issues requiring professional attention if it widens, lengthens, or develops a zig-zag pattern
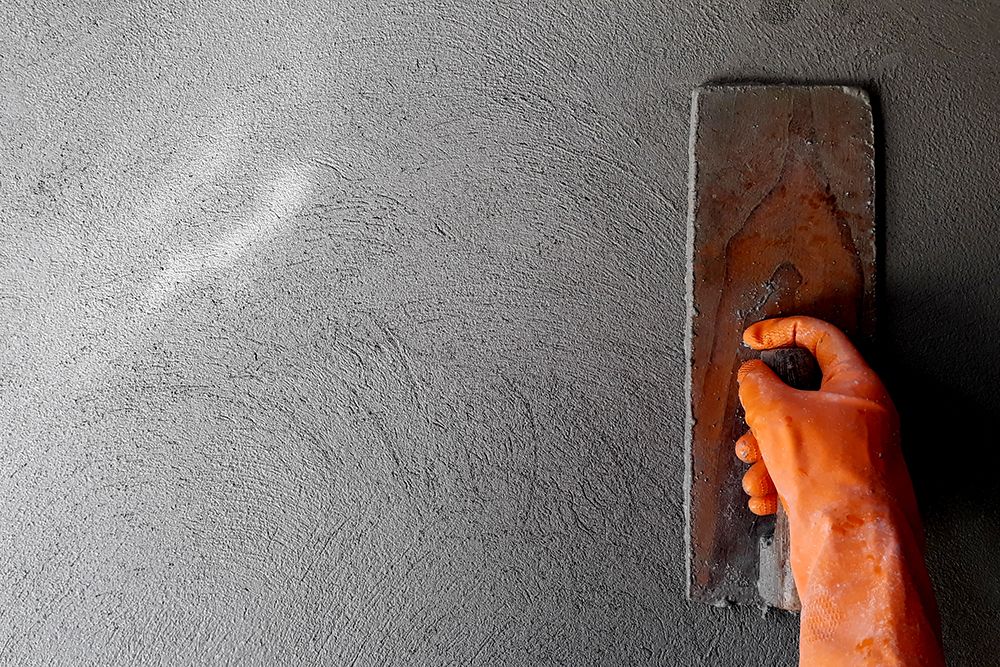
#2: Gathering the necessary supplies

Once you’ve assessed the crack, you know whom to call! Here’s a basic list of the tools they’ll bring to fix the wall cracks (depending on the crack size and type of repair required):
- Safety gear: Safety glasses, dust mask, gloves
- Cleaning materials: Drop cloths, rags, utility knife/scraper, a solution for heavy cleaning
- Patching materials: Joint compound (pre-mixed or setting-type), putty knife (various sizes), sanding paper (various grits), primer (optional)
- For larger cracks: Caulking gun, masonry caulk (for cracks wider than 1/4 inch), fibreglass mesh patch (for larger or deep cracks)
- Additional tools (optional): Hammer, chisel (for widening cracks), paintbrush (for applying primer)
#3: Preparing the crack
- The area is cleared: The furniture and wall hangings need to be moved away from the work area. The down drop cloths are laid to protect the floor and surrounding areas
- The crack is cleaned: A damp rag is used to remove dust, cobwebs, or any loose debris from the crack in the wall and surrounding area before the repair begins. For heavily soiled cracks, a TSP solution is used to rinse the crack with clean water. The area is allowed to dry completely before proceeding further
- The crack may be widened (optional): For larger cracks in the wall (wider than 1/4 inch), the V-shaped section is slightly widened using a hammer and chisel before the repairs. This creates a better key for the patching material to adhere to
Also Read: Wall Art Wonders: Exploring Ideas and Tips for Stylish Home Decor
#4: Filling the crack in the wall
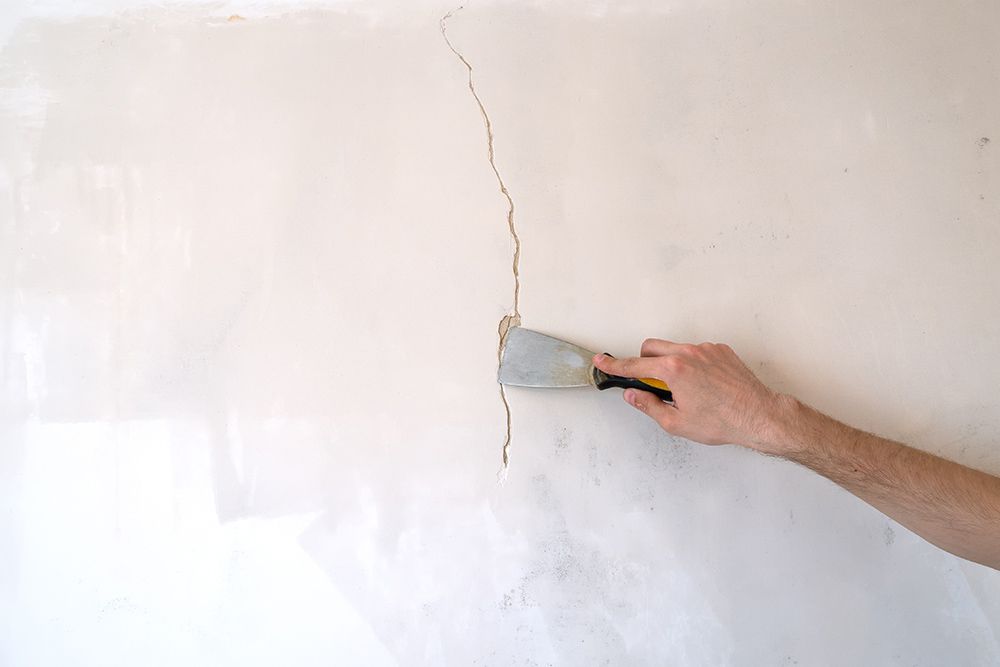
- The right wall crack filler (patching material): For filling hairline cracks in your walls, a pre-mixed joint compound is usually sufficient. For fixing larger wall cracks, a setting-type joint compound is used for better control and stability
- Apply the wall crack filler: The joint compound is applied with a putty knife by firmly pressing and filling the crack completely. Again, for fixing larger wall cracks, the compound is applied multiple times in layers and smoothened using a putty knife for a seamless finish
- The fibreglass mesh is applied (optional): For fixing larger or deeper wall cracks, a fibreglass mesh patch is used for added reinforcement. The piece of mesh is slightly larger than the crack so that it provides good adhesion when pressed onto the wet joint compound. They may also apply additional joint compounds over the mesh to ensure complete coverage
#5: Finishing touches

- Sanding: Once the joint compound has dried completely, the area is smoothened using sandpaper (starting with a coarser grit and progressing to finer grits). The sanding is done lightly so that the surrounding walls are not damaged
- Priming (optional): For a flawless finish while repairing the cracks in your walls, a coat of primer is applied to the patched area. The primer chosen will always be compatible with the chosen paint and wall surface
- Painting: Once the primer is dry (if used), the final paint that matches your existing wall colour is applied and viola, you have a wall as good as new!
Also Read: How to Keep Your Home Clean & Dry in the Rainy Season?
Addressing underlying issues of wall cracks
While repairing cracks in your walls can improve aesthetics, it’s crucial to address the underlying cause, especially for larger cracks or those showing movement. Here are some things to consider:
- Consult a professional: If you suspect structural issues or extensive foundation settlement, consult a qualified structural engineer for proper evaluation and repairs
- Moisture control: Cracks can sometimes indicate moisture problems. Identify potential sources of moisture, such as leaky pipes or roofing issues, and address them promptly to prevent further damage
Also Read: How to Prevent Dampness in Walls? Here are Our Top Dampness Solutions for Your Home
Would you like to repair the cracks in your walls yourself till you get professional help?
With these little DIY know-how, you can address them yourself as a temporary fix until a professional can take a look! But remember these are not long-term fixes:
1. Soap (for hairline cracks):
- This method works best for very thin cracks with minimal depth
- Use a bar of white soap (avoid coloured varieties)
- Gently rub the soap along the crack to fill the gap
- Buff the area with a dry cloth to remove excess soap residue
- This creates a temporary barrier and might offer some dust protection, but it won’t provide much structural reinforcement
2. Toothpaste (for tiny cracks):
- Similar to soap, toothpaste can be used for hairline cracks as a temporary measure
- Apply a small amount of white toothpaste (avoid gel formulas) into the crack
- Use a damp cloth to smooth the toothpaste and remove any excess
- Again, this offers minimal structural support and might shrink as it dries
3. Baking soda and glue mixture (for slightly wider cracks):
- This method requires more effort but can provide a slightly more durable yet temporary fix
- Mix a small amount of baking soda with white glue to create a paste-like consistency
- Apply the paste into the crack using a putty knife (or a similar tool if unavailable)
- Let the mixture dry completely, then gently sand any uneven areas
- This offers a bit more structure compared to soap or toothpaste but still isn’t a permanent solution
Important considerations:
- These methods are purely temporary and won’t last long
- They offer minimal structural reinforcement and might not prevent the crack from expanding
- Professional repair with proper wall filler is necessary for a long-lasting solution
- If you notice moisture around the crack, leaking, or significant movement, don’t attempt a DIY fix. Seek professional help immediately as it might indicate a larger underlying issue
Hide those cracks in your walls with these home decor ideas
Check out the following home decor ideas to fix wall cracks!
#1: Frame fixes

Cracks got you down? Hide them easily with some photo frames!
#2: Wallpaper it!

Applying wallpaper over the cracked area can effectively cover the crack and add a new design element to your space, as long as the crack is not very wide. Choose a patterned wallpaper design that will help disguise the crack’s straight lines.
#3: Mandala tapestry

Tapestries are great for making a boho chic home interior look even better, but they can also hide cracks in walls! They add a fun splash of colour, especially in rooms with mostly neutral tones (beige, white, grey).
#4: Mirror, mirror on the wall…
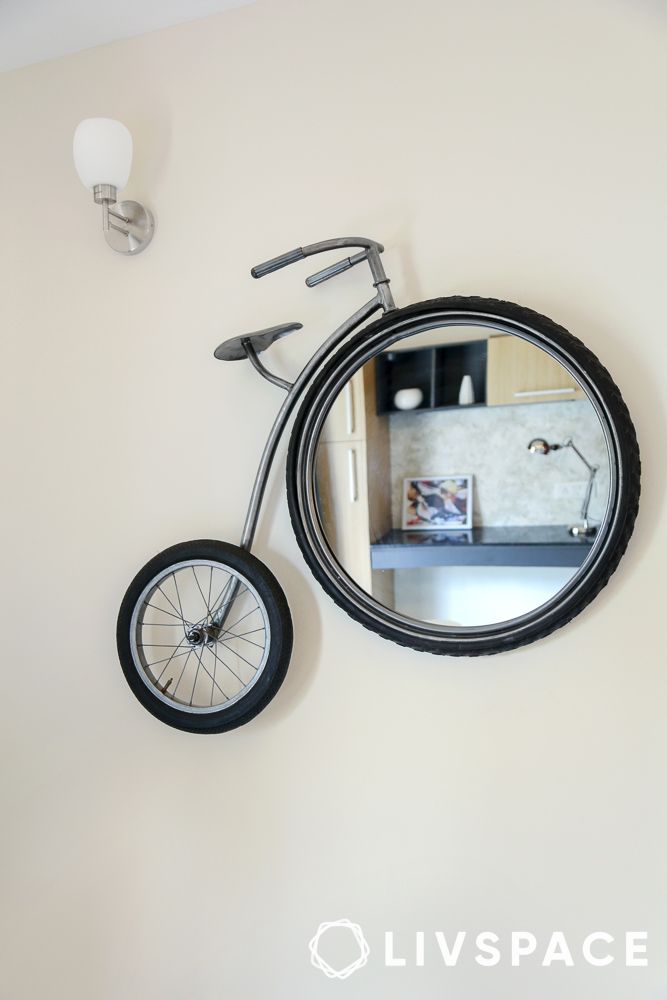
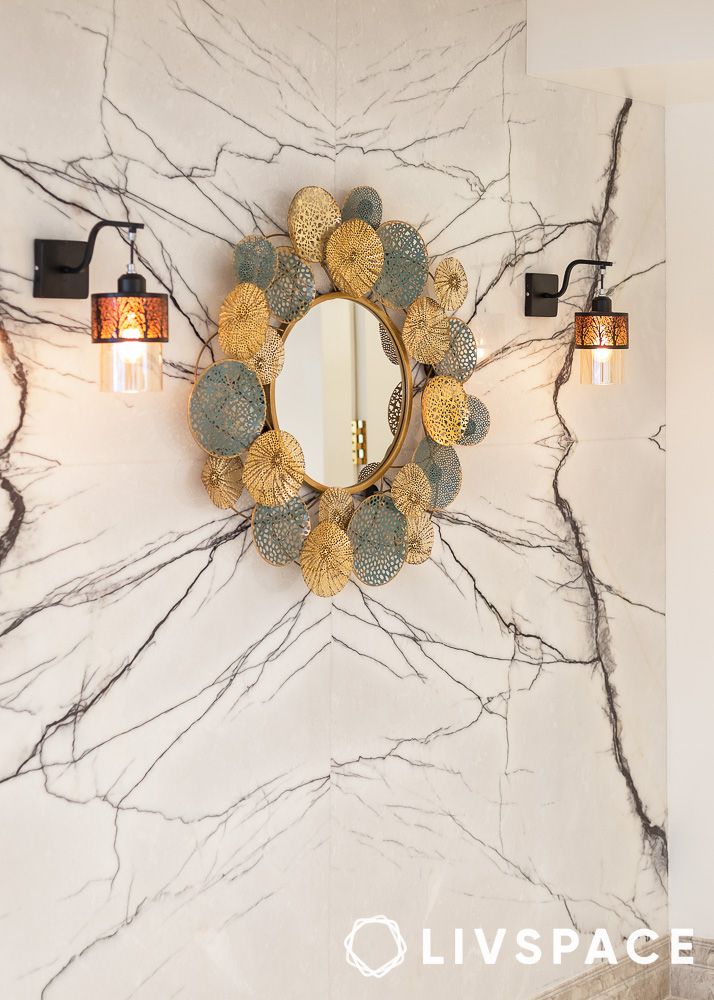
Decorative wall mirrors divert attention from the crack and add a unique touch.
#5: Bookshelf or plants?

Wall cracks can be effectively hidden by strategically placing a bookshelf or a tall potted plant in front of them. That wall could even turn into your own home library design!
#6: Climbing vines (for small cracks)
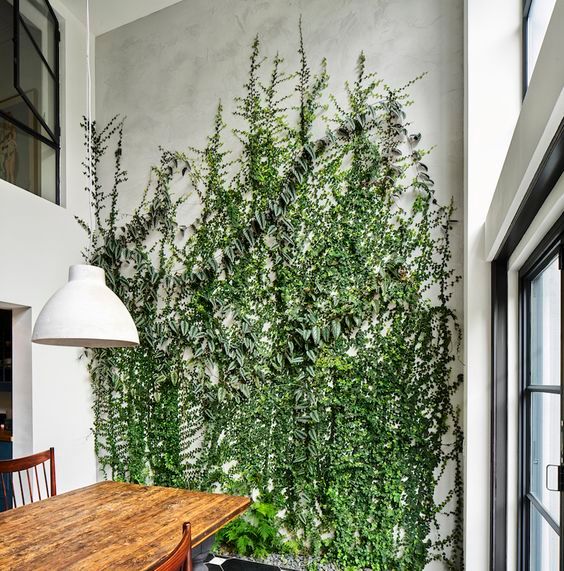
Image source: Pinterest @RMGardenista
If the crack is small and strategically located, you can introduce trailing houseplants like pothos or philodendrons. Let the vines cascade down the wall, cleverly disguising the crack with greenery.
How can Livspace help you?
Livspace understands the importance of a beautiful and safe living space. Our designers can recommend materials that are long-lasting and of premium quality for your home interiors.
- We offer a flat 10-year warranty*
- Our products undergo 146 quality checks
- We have served over 75,000 happy #LivHomes
Book a consultation with us NOW to get your dream home interiors!
*For select finishes on modular products. For full scope of warranty, please visit livspace.com/in/service.
Disclaimer: All contents of the story are specific to the time of publication. Mentions of costs, budget, materials, finishes, and products from the Livspace catalogue can vary with reference to current rates. Talk to our designer for more details on pricing and availability. The Pinterest images used in this blog are solely for illustrative purposes. We do not claim ownership of these images, and all rights belong to their respective owners. If you are the owner of any image and would like it to be removed or credited differently, please contact us.


